

How To Upload Photos To Vogue
I've been a photographer at present for nearly 3 years, mainly as a hobby, using the medium to tell stories almost people I meet. I normally post my photos on Instagram perchance once every 3 months, not posting more is by and large due to laziness. The whole thought of photos for me is generally very fun, simply subsequently a while, I pondered on trying out photography as a "side hustle", and so I gear up out to expect for opportunities available to photographers. As y'all can already imagine, photography is one very hard industry to get into. It's highly competitive and you're competing against actually talented individuals with years and years of experience. Whilst you might get a few wedding gigs if you're lucky, getting into beauty companies or campaigns is one thing that could potentially be a frustrating process for photographers in full general. Most of the fourth dimension photographers will end up giving up on making a sustainable career out of it and finish up getting a 9-5 task, to proceed the passion for their chosen art form burning out. Just one mode to make your portfolio stand out in applications, from my experience is to be "vogue approved."
Some years ago, Vogue Italia started a platform for photographers all over the world to share their photos. To be posted on the website, you need to get through their review team who take a very non-transparent strict ready of rules to follow. One sure thing is that if your photos are photograph vogue canonical, that ways your work is to a expert enough standard to appear on industry-respected magazines hence submitting your Vogue portfolio could give you an extra advantage during your task applications. All the same, information technology's very difficult to get into, since vogue doesn't provide criteria or ways to brand your photo stand out. Many talented photographers submit photos to vogue every Monday but are unable to fit into the aesthetic vogue wants. Through trial and fault and a bit of research, notwithstanding, I have been able to get 6 of my photos into photovogue over the past two years, and then I'm going to show you lot how to practice information technology!
What is photovogue looking for
A quick look at the photovogue website and you can see how crisp their images are, simply most importantly, the images are very raw and commonly evoke strong feelings. This is what photography is virtually, after all, beingness able to tell a story through your iPhone or photographic camera lenses. And so when you take a raw photo, make sure it's a story that has a raw emotional quality to it. Photos of evocative bug similar breastfeeding, scars, pregnancy, nudity, comparison between the old and the young are the type of photos you volition find on the first page of photovogue. You lot can use a high-end camera but you lot could also utilise your mobile phone, the thought of the epitome is what counts the most.
Okay permit's get to editing
So you've taken that evocative artistic photo and now yous're wondering how to edit it to fit into photovogue's aesthetic. Well from my experience, less is more when it comes to these photos! Photovogue selections unremarkably take a very color rich yet desaturated kind of look to information technology, if you're not sure how to get this aesthetic the all-time matter to do is submit your photo in blackness and white. But to brand your photos stand up out more, try to increment the sharpness of your subject'south optics.
Selectively increase sharpness
And then to exercise this, you can employ many different apps only I use photoshop. The commencement thing y'all desire to do is load the photo into Photoshop, indistinguishable the background layer using the commands ctrl-J on your keyboard, or click on layer and cull indistinguishable layer from the drop-downwards card. Afterward doing this, y'all want to desaturate your photo and simultaneously select a mask and the "alt" key on your keyboard. Afterwards this, click on filter, then cull other, from other, choose high pass and increase by approximately 20. Alter the settings on the desaturated paradigm to overlay, click on the mask and by using the brush tool you lot can sharpen whatever role of the image yous want. You can subtract the intensity of the sharpness using the opacity slider. Here's a quick video tutorial I created to explain this.
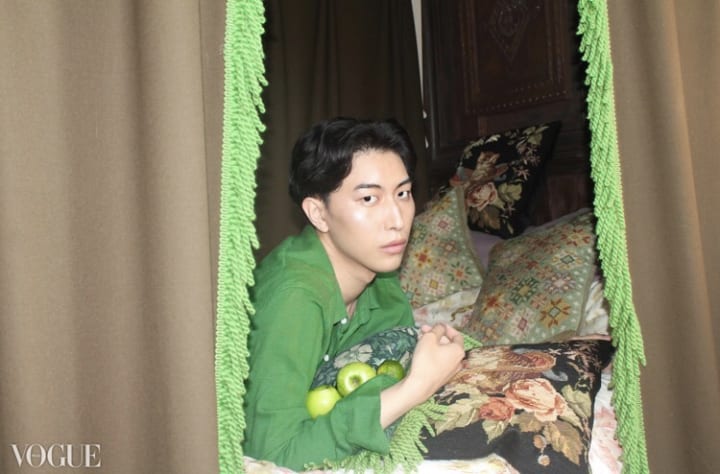
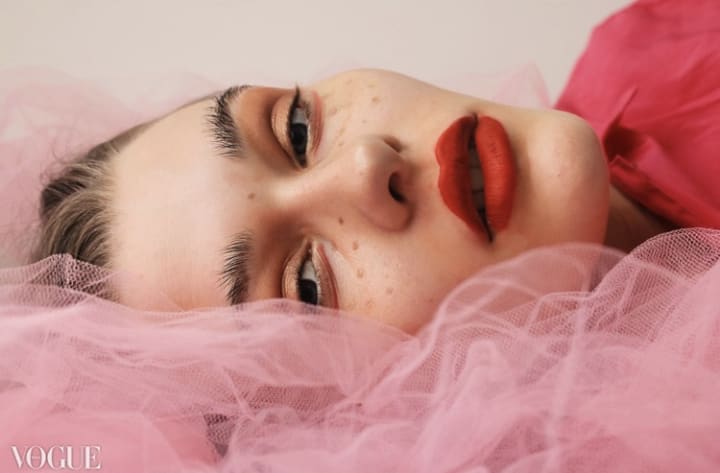
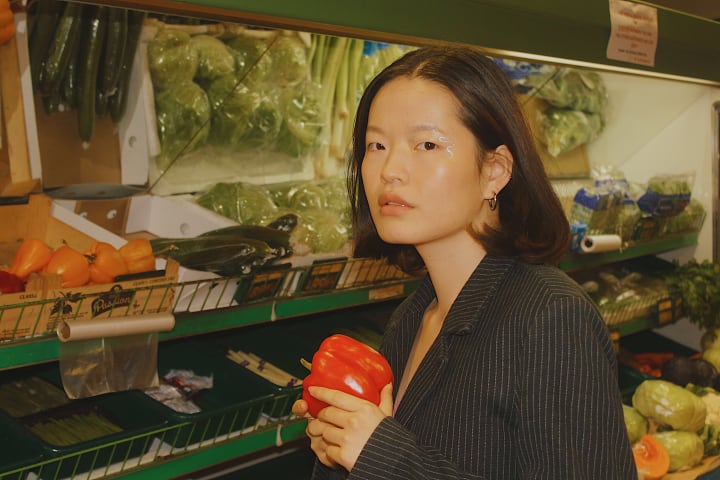
What this does is it allows you to selectively acuminate parts of an image equally opposed to sharpening the whole paradigm, if in that location's a quality about the photo you lot'd like to draw attention to whilst keeping the residue of the photo as it is, this volition exist a very adept mode to practice information technology. Sharpening the optics, Cupid'southward bow or even eyebrows can make a massive divergence to your image whether you plan to submit it to photovogue or not. You could submit the photo to photovogue without editing it any further, as photovogue is partial to photos that aren't heavily edited or retouched. Examples of my photos that got accepted by photovogue using this method are below. Every bit y'all can see from the images, the eyes and the eyebrows are abrupt giving the illusion of overall sharpness. I've done nothing else to them.
Submit your photograph in black and white
Black and white photos with selective sharpening are besides photos that are usually accepted by photovogue, though I've never used the white and black format in my submissions I've noticed there's a big majority of photos on photovogue that follows this format. The good news? Information technology's so easy to edit! One click on photoshop or gratuitous apps like VSCO and you tin can easily turn your image into blackness and white. Make sure you acuminate the prototype first!
Desaturation whilst keeping vibrance
And then you lot might take noticed the somewhat yellow undertone in the aesthetics of photos on the vogue website. I tried for so long to imitate this effect and at first, my submissions were rejected only finally, I figured information technology out. If you lot're using photoshop, the showtime thing you want to do is acuminate parts of the image equally brash in pace i. Then click on saturation/vibrance. Reduce the saturation by around eight and increment the vibrance by a similar corporeality. The adjacent matter to do is keep selective color, reds and yellows are especially practiced for this, you can play effectually with the slides and see what looks best, I unremarkably increase the cyan and yellow slides on both. To finish, choose colour expect upwards and apply the FUJI 250D filter, reduce the opacity and of course sharpen the entire image later on.
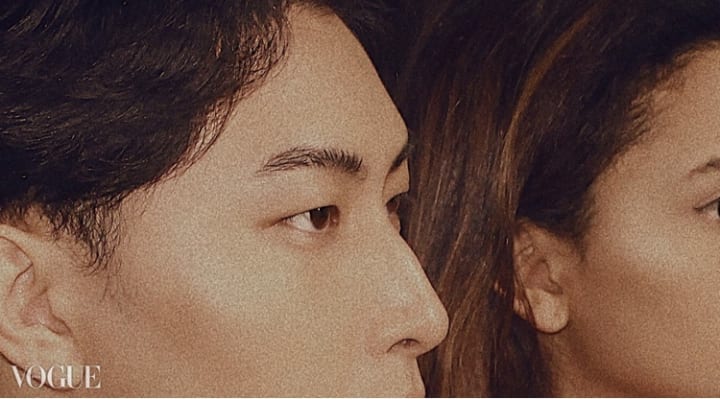
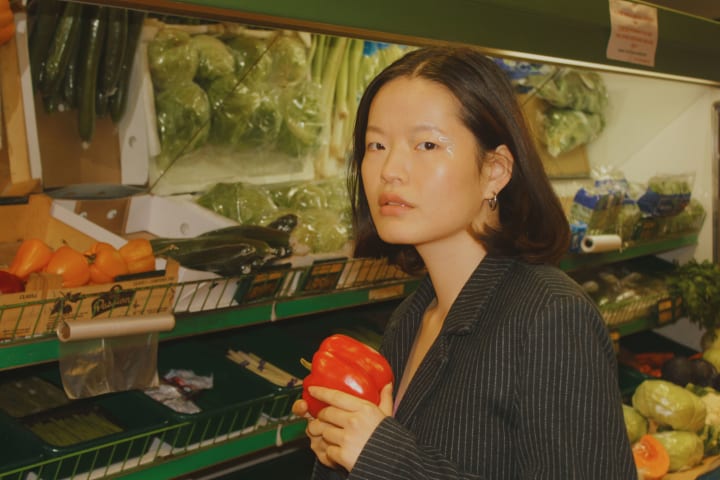
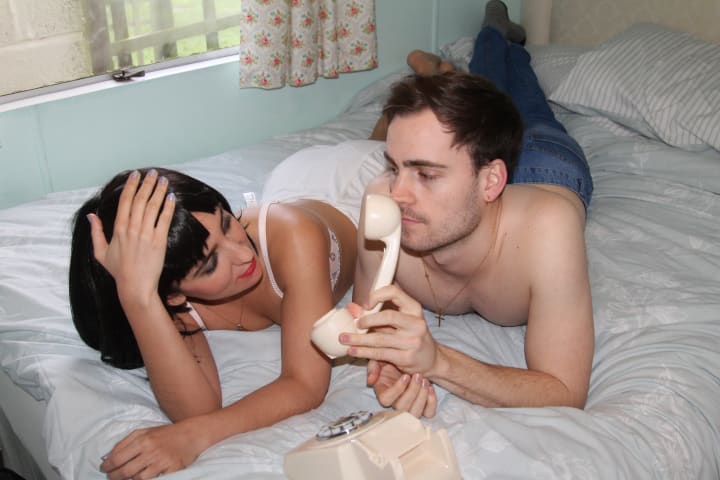
Final earlier and after:
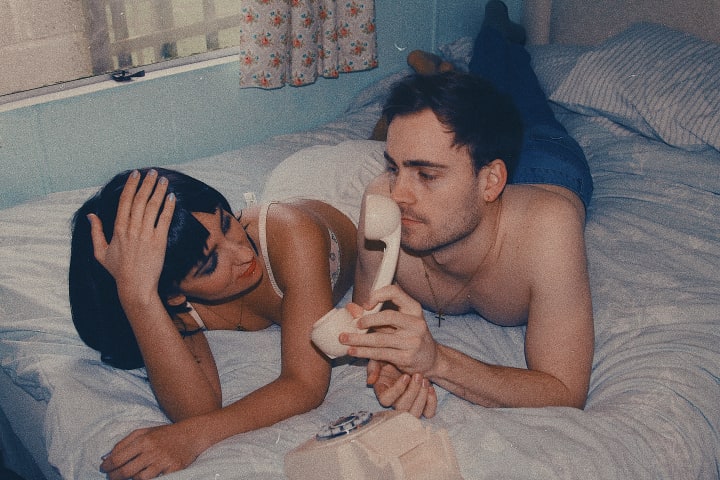
If you want to use VSCO to go a similar issue, you can try the G3 free filter, but brand sure you reduce the intensity of the result. I'd strongly advise using photoshop for the photovogue aesthetic. Below is one of my photos that got accepted by photovogue using the aforementioned method:
Then those are three steps to get your photo on photovogue that I've personally tested over the years that has worked for me! You lot can play effectually with some of the steps and run into which one gets accepted. Information technology'due south quite easy one time you get the hang of it, but the virtually important advice I'd give is to start with a adept base betoken - the photo itself.
For non-photographers who are just trying to edit their personal photos, here are a few tips to make your photos stand out!
Sharpening
Sharpening really does make a big difference when it comes to increasing the quality of your photograph. Unlike professional person photos, you tin can get away with sharpening your overall personal images using apps like VSCO. To practice this, simply download the complimentary version of the app and click on acuminate! Don't go as well crazy with this though as it tends to somewhen give the prototype a weird halo effect, I tend to stay between 15-20 for a good balance. An example is below:
Vintage it out
And then have you ever wondered how to go that grainy vintage-looking photo y'all run into on Instagram? Well, it'due south actually quite easy to practice using apps like VSCO and prequel. To do this on VSCO, load your photograph into the editing suite and cull whatever of the coloured filters, I usually use the C1 filter as information technology just gives information technology a practiced base of operations for a vintage-looking experience. Increase saturation by 5-x and sharpen as explained above. Now here's the important chip, you might have noticed that vintage-looking photos usually have grainy qualities to them. To practise this, click on grain in VSCO and increase by 15-35. Doing these three steps will give your image a very filmy vintage look! To take it further you could also add a yellow caption to it, whilst you can do this on VSCO, you might have to pay for it. But a gratis app I use for adding captions to my images is Phonto. Hither's an example below:

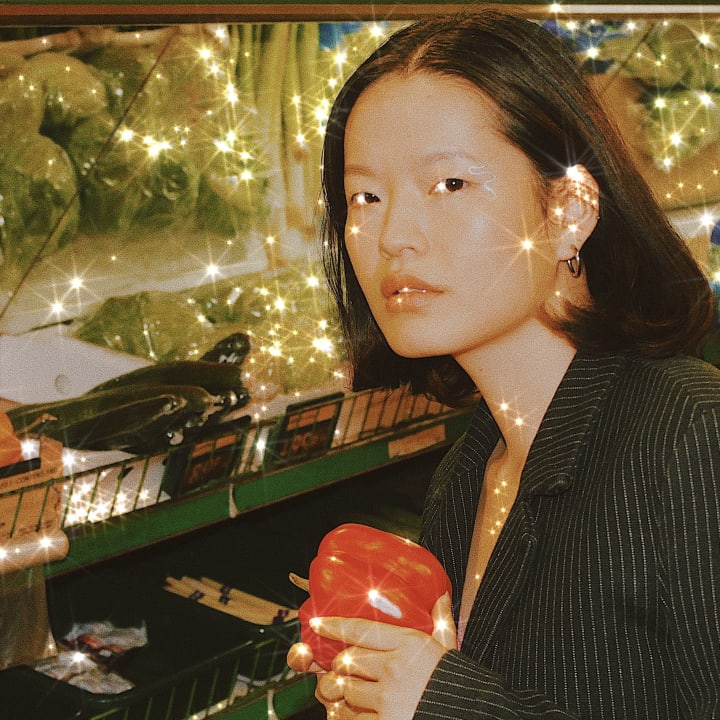
Add sparkles or flowers!
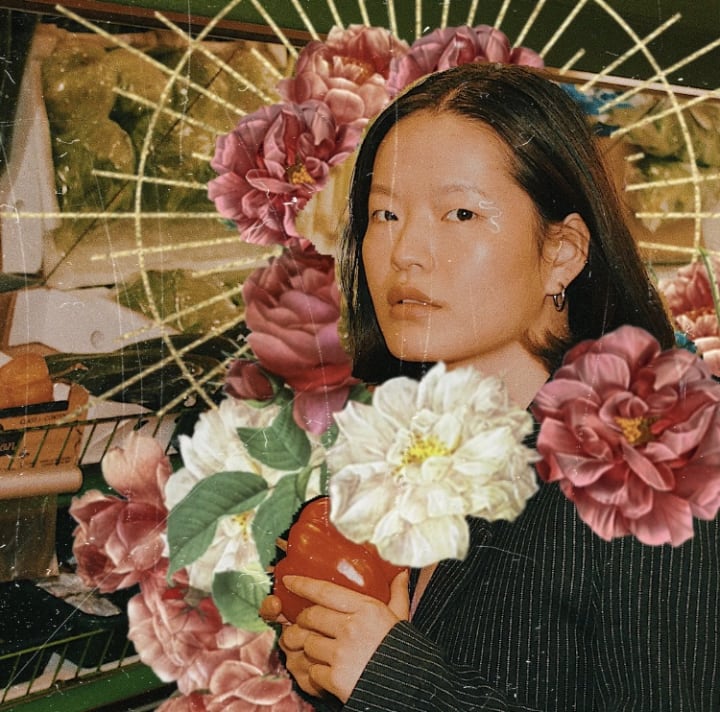
Some other unique way to edit your personal photos is to add the sparkle or flower result! Doing this is actually pretty easy using prequel, it's a free app you can download on your phone and it contains many presets to accept your personal photos to the next level. To add together sparkles to your photo, load your photo into prequel and choose the stardust preset. To add together flowers, use the bloom event! Voila! Your photo is sparkled and flowered to perfection. An example is below.
So whether you lot're a photographer hoping to proceeds an advantage in your job applications by getting onto photovogue or you're just looking for tips to heighten your personal photos, I hope you've learnt something from the above tips! Thanks for reading.
If you enjoyed reading this, please give my LBB submission "The waiting room" a read, it's a story painted in watercolour well-nigh the effects of addiction on family members and the person struggling with it, you lot might like it!
Y'all can check out my full portfolio here
Take a squeamish solar day!

How To Upload Photos To Vogue,
Source: https://vocal.media/photography/how-to-get-your-photos-into-vogue
Posted by: andersoncaminarthe.blogspot.com
0 Response to "How To Upload Photos To Vogue"
Post a Comment